Whether we’re about to work together or you need to provide access to a third-party, sometimes you’ll need to add an admin to your WordPress website. Don’t worry, it’s pretty simple! Just a couple things to note:
- WordPress is pretty bad at sending new login details when a profile is created, so make sure to copy/paste the username and password into a separate email and send it that way.
- The same goes for password resets, unfortunately.
Step One
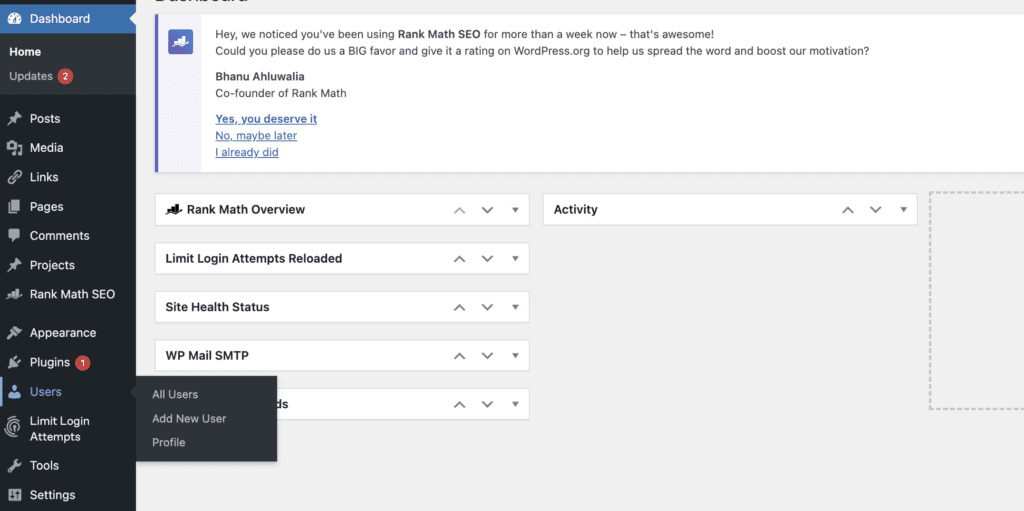
On the left side of your WordPress backend, you’ll see a list. This list will vary from site to site, due to plugins, but you’ll find “Add New User” under “Users.”

Step Two
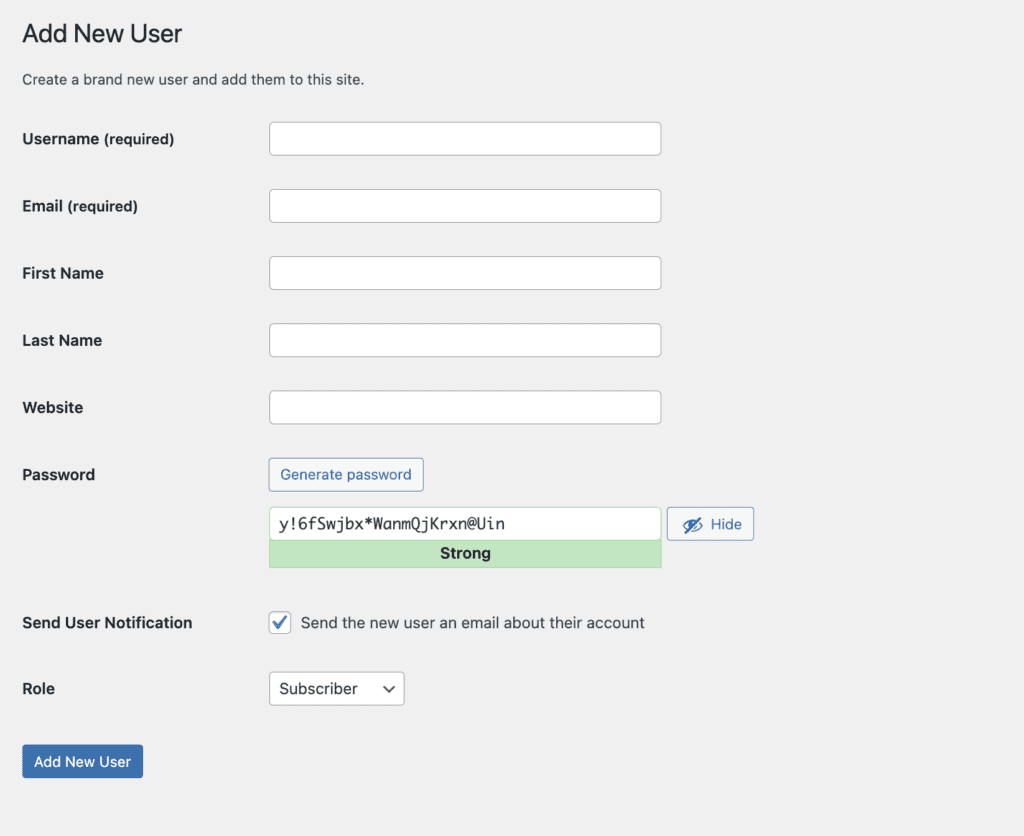
Here, you’ll see different info to input. The most important info are the required fields, Username, Email, and Password. But also setting the role, which is in the next step.
You can copy/paste this email into the email you’re about to send or make one up yourself. Just do NOT add the user until you’ve copied and pasted it—you won’t have access to it again.

Step Three
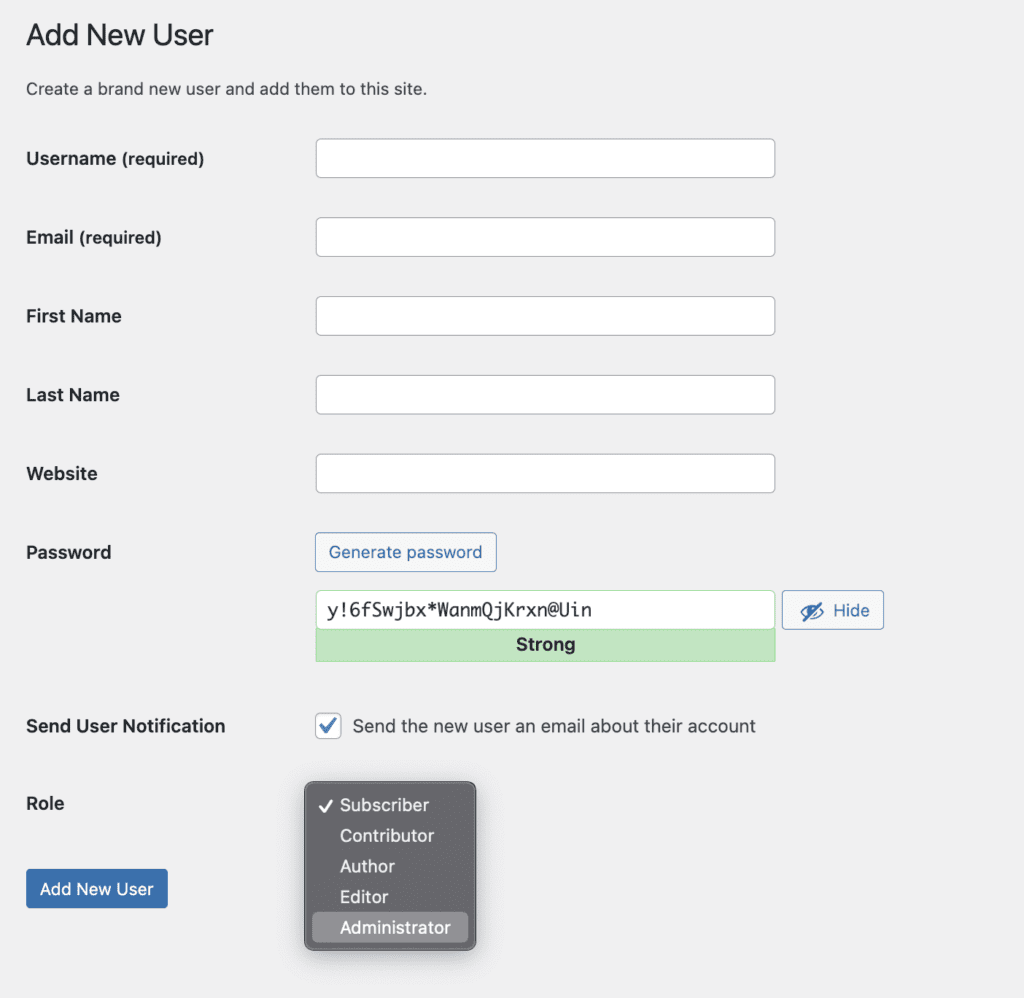
If you’re adding someone as a user, there’s a good chance it’s because they need administrative privileges. For the sake of this article, you’re going to choose “Administrator” as the option.

Step Four
Send the information to whoever needs it! Make sure to send them their user name and password. If you ever need to delete someone, it’s pretty easy! Go to “Users” and next to their profile, you’ll see “Delete.”